


In today's competitive software landscape, delivering applications rapidly without compromising quality is crucial. Implementing robust Continuous Integration and Continuous Deployment (CI/CD) pipelines is essential for teams aiming to accelerate delivery cycles, enhance product quality, and maintain operational efficiency. By leveraging Docker and Amazon Web Services (AWS), developers can create scalable, efficient, and secure CI/CD pipelines.
In this post, we'll explore how to implement a CI/CD pipeline using Docker containers and AWS services like AWS CodePipeline, AWS CodeBuild, Amazon Elastic Container Registry (ECR), and Amazon Elastic Container Service (ECS). This guide provides a step-by-step approach, highlighting best practices to ensure your pipeline is optimized for speed and reliability.
Why Docker and AWS for CI/CD?
Combining Docker and AWS offers numerous benefits:
- Portability: Docker containers ensure consistency across environments.
- Scalability: AWS services scale seamlessly with your application's needs.
- Efficiency: Automate repetitive tasks, reducing manual intervention.
- Security: AWS provides robust security features and compliance certifications.
Prerequisites
- An AWS account with administrative privileges.
- Basic knowledge of Docker and containerization concepts.
- Familiarity with AWS services, particularly ECS and ECR.
- A sample application (we'll use a Node.js application for demonstration).
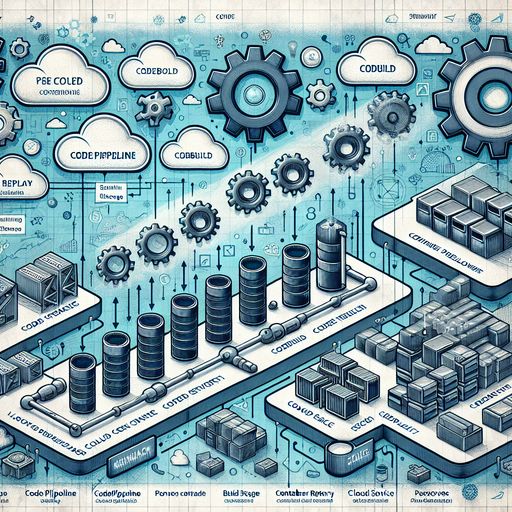
Overview of the Architecture
Our CI/CD pipeline will include the following stages:
- Source Stage: Code is pushed to a version control system (e.g., AWS CodeCommit, GitHub).
- Build Stage: CodeBuild builds the Docker image and runs tests.
- Deploy Stage: The image is pushed to ECR, and ECS deploys it to a cluster.
Step 1: Setting Up the Source Repository
First, host your application's code in a repository. For seamless AWS integration, AWS CodeCommit is recommended.
Using AWS CodeCommit
-
Navigate to the AWS CodeCommit console.
-
Create a new repository named
my-app-repo. -
Clone the repository to your local machine:
git clone https://git-codecommit.us-east-1.amazonaws.com/v1/repos/my-app-repo -
Add your application code to the repository and commit the changes:
git add .
git commit -m "Initial commit"
git push origin master
Step 2: Containerizing the Application with Docker
Create a Dockerfile to define how your application is containerized.
Sample Dockerfile for Node.js Application
# Use Node.js LTS version as the base image
FROM node:18-alpine

# Set the working directory in the container
WORKDIR /usr/src/app

# Copy package.json and package-lock.json
COPY package*.json ./

# Install dependencies
RUN npm install --production

# Copy the rest of the application code
COPY . .

# Expose the application port
EXPOSE 3000

# Start the application
CMD ["node", "app.js"]
Best Practices:
- Use a minimal base image to reduce the image size.
- Copy only necessary files to optimize build caching.
- Run container-specific user permissions for enhanced security.
Step 3: Creating a Build Specification for CodeBuild
AWS CodeBuild requires a buildspec.yml file to define build commands.
Sample buildspec.yml
version: 0.2

phases:
  pre_build:
    commands:
      - echo Logging into Amazon ECR...
      - $(aws ecr get-login-password --region us-east-1 | docker login --username AWS --password-stdin <AWS_ACCOUNT_ID>.dkr.ecr.us-east-1.amazonaws.com)
      - REPOSITORY_URI=<AWS_ACCOUNT_ID>.dkr.ecr.us-east-1.amazonaws.com/my-app-repo
  build:
    commands:
      - echo Building the Docker image...
      - docker build -t $REPOSITORY_URI:latest .
  post_build:
    commands:
      - echo Pushing the Docker image...
      - docker push $REPOSITORY_URI:latest
artifacts:
  files:
    - '**/*'
Note: Replace <AWS_ACCOUNT_ID> with your actual AWS account ID.
Step 4: Setting Up Amazon Elastic Container Registry (ECR)
Amazon ECR is a fully-managed Docker container registry.
- Navigate to the Amazon ECR console.
- Create a new repository named
my-app-repo. - Note the repository URI; you'll need it for the
buildspec.yml.
Step 5: Configuring AWS CodeBuild Project
AWS CodeBuild automates the build and test phases.
- Navigate to the AWS CodeBuild console.
- Create a new build project named
my-app-build. - Configure the following settings:
- Source Provider: AWS CodeCommit.
- Repository:
my-app-repo. - Environment:
- Managed image: Ubuntu Standard.
- Runtime(s): Docker.
- Privileged: Enabled (required for Docker build).
- Buildspec: Use the buildspec.yml in the source code.
Step 6: Setting Up AWS CodePipeline
AWS CodePipeline automates the CI/CD workflow.
- Navigate to the AWS CodePipeline console.
- Create a new pipeline named
my-app-pipeline. - Source Stage:
- Provider: AWS CodeCommit.
- Repository:
my-app-repo. - Branch:
master.
- Build Stage:
- Provider: AWS CodeBuild.
- Project:
my-app-build.
- Deploy Stage:
- Provider: AWS ECS.
- Cluster Name:
my-ecs-cluster. - Service Name:
my-app-service.
Step 7: Configuring Amazon Elastic Container Service (ECS)
Amazon ECS orchestrates Docker container deployment.
Create an ECS Cluster
- Navigate to the Amazon ECS console.
- Create a new cluster named
my-ecs-cluster.- Choose the appropriate launch type (e.g., Fargate for serverless).
Define a Task Definition
- In the ECS console, go to Task Definitions.
- Create a new task definition named
my-app-task.- Task Role: Create a new IAM role with necessary permissions.
- Network Mode:
awsvpc(for Fargate). - Container Definitions:
- Container Name:
my-app-container. - Image:
<AWS_ACCOUNT_ID>.dkr.ecr.us-east-1.amazonaws.com/my-app-repo:latest. - Port Mappings: Container port
3000to host port80.
- Container Name:
Create a Service
- In the ECS console, go to Services.
- Create a new service named
my-app-service.- Launch Type: Fargate.
- Task Definition:
my-app-task. - Cluster:
my-ecs-cluster. - Number of Tasks: Set desired count.
- Deployments: Enable rolling updates.
Step 8: Testing the CI/CD Pipeline
With the pipeline set up, it's time to test it.
-
Make a code change in your local repository.
-
Push the changes to the
masterbranch:git add . git commit -m "Updated application" git push origin master -
Monitor the pipeline in the AWS CodePipeline console.
-
Wait for the pipeline to complete all stages.
-
Verify the deployment in the ECS console.
Enhancing the Pipeline
Implementing Automated Testing
Add testing commands to the buildspec.yml:
phases:
  build:
    commands:
      - echo Running unit tests...
      - npm test
      - echo Building Docker image...
      - docker build -t $REPOSITORY_URI:latest .
Using Infrastructure as Code
Leverage AWS CloudFormation or Terraform to manage AWS resources.
- Define all AWS resources in templates.
- Version control your infrastructure code.
- Enable consistent and repeatable deployments.
Integrating with AWS CodeArtifact
Manage dependencies with AWS CodeArtifact.
- Store software packages securely.
- Share dependencies across teams.
Security Best Practices
- IAM Roles: Assign least-privilege permissions.
- Secrets Management: Use AWS Secrets Manager for sensitive data.
- Network Security: Implement VPCs, subnets, and security groups appropriately.
- Logging and Monitoring: Enable AWS CloudTrail and AWS CloudWatch.
Monitoring and Logging
- AWS CloudWatch Logs: Collect and analyze logs from ECS tasks.
- AWS X-Ray: Trace and debug distributed applications.
- Alerts and Notifications: Configure Amazon SNS for notifications on pipeline failures.
Cost Optimization
- Use Spot Instances: Reduce compute costs with Amazon ECS Spot.
- Right-Sizing Resources: Adjust resource allocation based on usage metrics.
- Cleanup: Remove unused resources regularly.
Conclusion
Implementing a CI/CD pipeline with Docker and AWS empowers development teams to deliver applications faster and with greater confidence. By automating the build, test, and deployment processes, you minimize errors and enhance productivity. AWS provides a comprehensive suite of tools that integrate seamlessly, offering scalability, security, and flexibility.
Start leveraging Docker and AWS for your CI/CD pipelines today to streamline your development workflows and stay ahead in the competitive software landscape.
Keywords: CI/CD, Docker, AWS, Continuous Integration, Continuous Deployment, DevOps, AWS CodePipeline, AWS CodeBuild, Amazon ECR, Amazon ECS, Infrastructure as Code, Security Best Practices, Monitoring, Cost Optimization